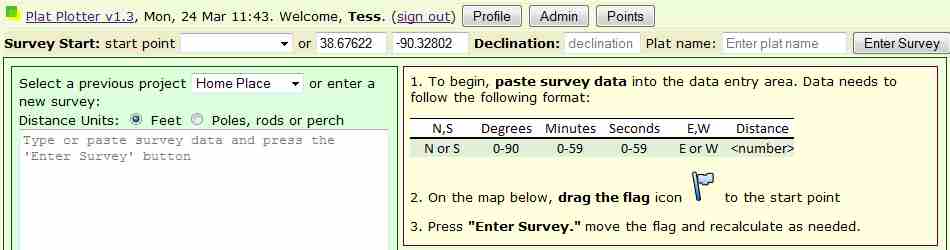
Two inputs are required to create a plat: survey metes and bounds and a starting point identified on the map. The Plat may also require a declination angle, but the default of zero works to get started.
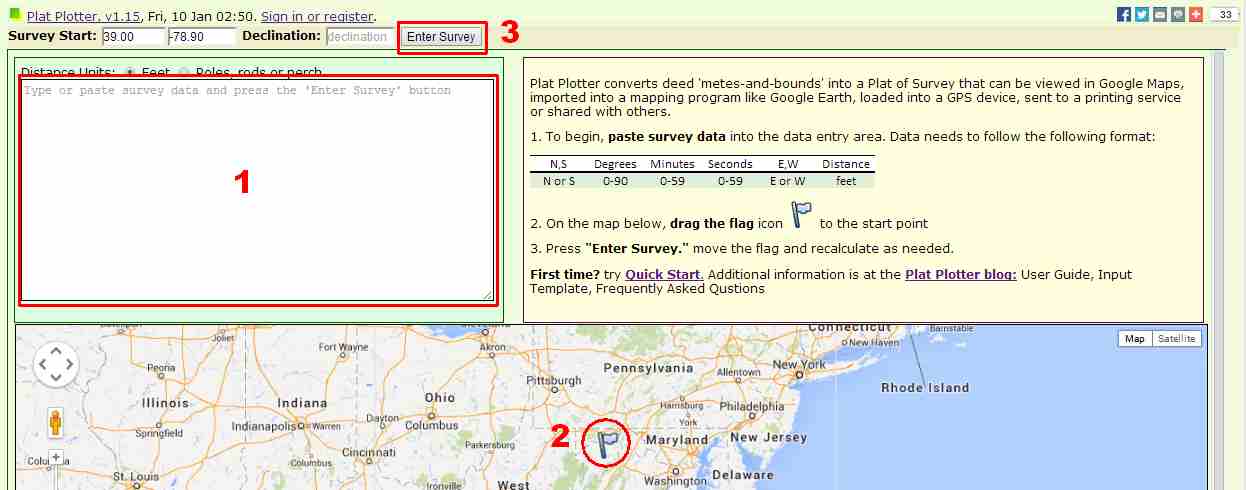
1. Copy survey data into the data entry area.
Data needs to follow the following format:- S or N
- Degrees (0.0-90)
- (optional: minutes 0-59)
- (optional: seconds 0-59)
- E or W
- Distance (feet or poles/rods/perch)
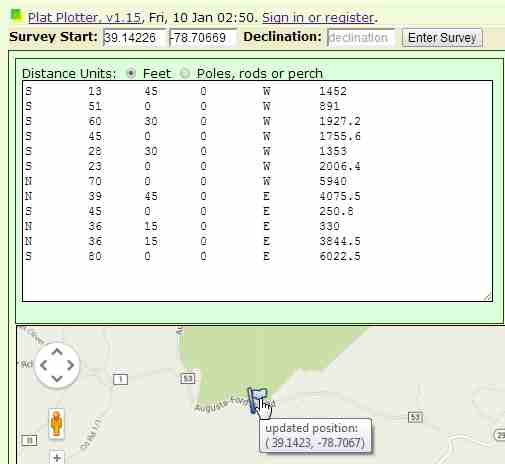
S        13      45      W       1452
S        51              W       891
S        60      30      W       1927.2
S        45              W       1755.6
S        28      30      W       1353
S        23              W       2006.4
N        70              W       5940
N        39      45      E       4075.5
S        45              E       250.8
N        36      15      E       330
N        36      15      E       3844.5
S        80              E       6022.5
2. On the map, drag the flag to the start point.
Use the map controls to zoom in and change from road map to satellite to get the best guess start point. The latitude and longitude is automatically updated.
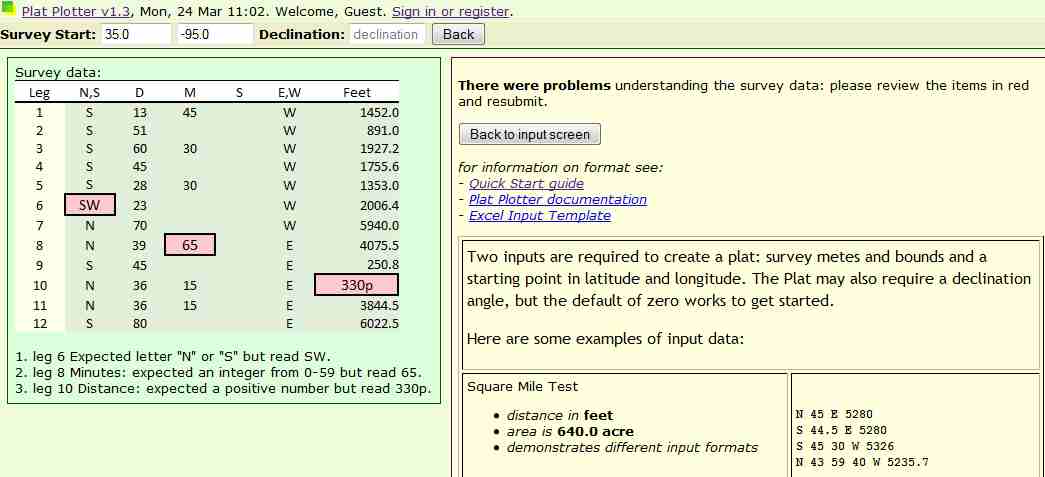
3. Press “Enter Survey.”
The data input will be checked and a plat calculated based on a default starting location and declination. The program reports the number of legs read and how well the plat closes (distance from the calculated end point to the start point.)
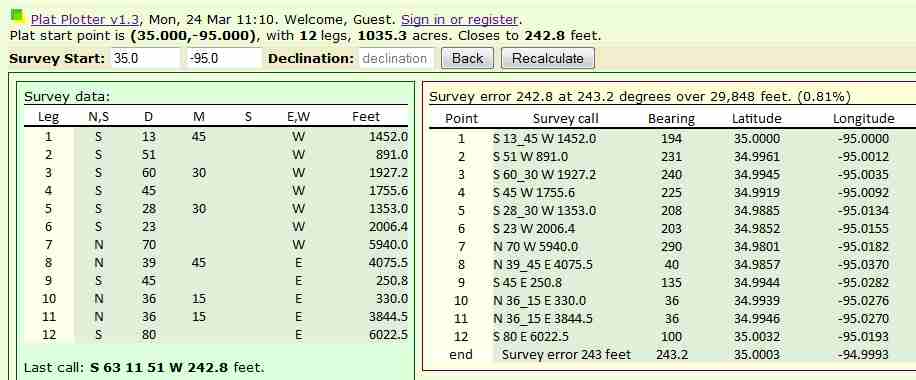
The plat will be deployed with a flag at the starting point.
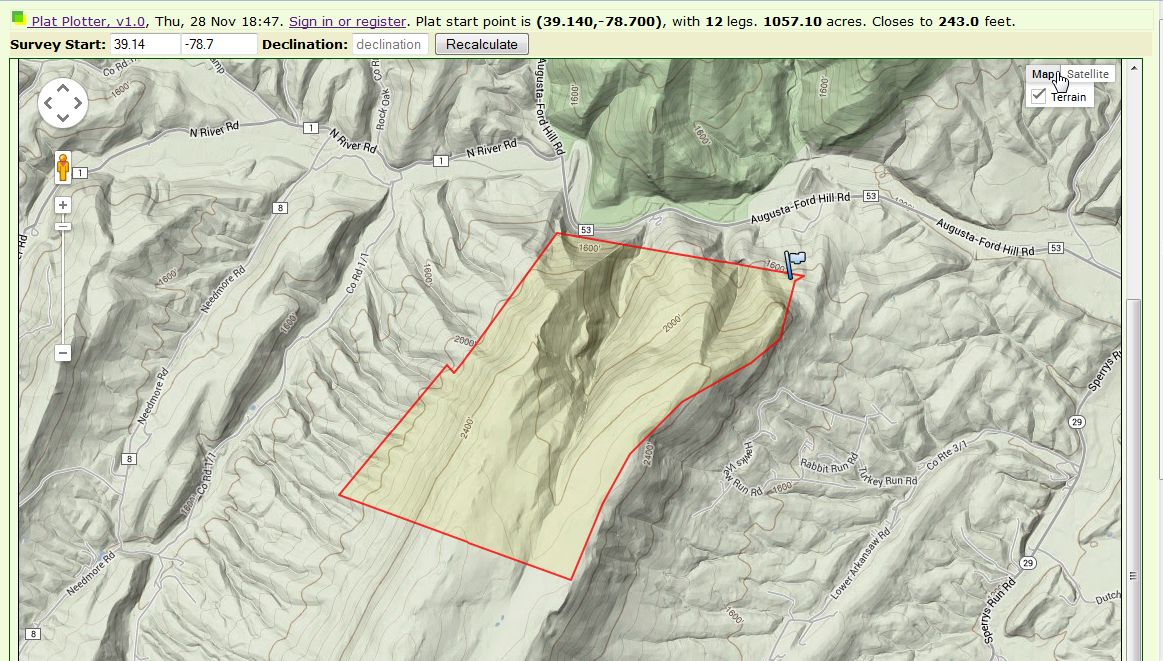
5. Adjust the start point and declination.
Borders often follow ridges, rivers and roads. Fences and fields often follow borders. Using map controls, compare the plat to map features at various zoom levels.
Dragging the ‘start’ flag sets a new start point. Look at long borders to see if the declination needs to be changed to rotate the plat. Once changes are made, the plat must be recalculated.
This example uses a start point of 39.140, -78.700 with 0 degrees declination.

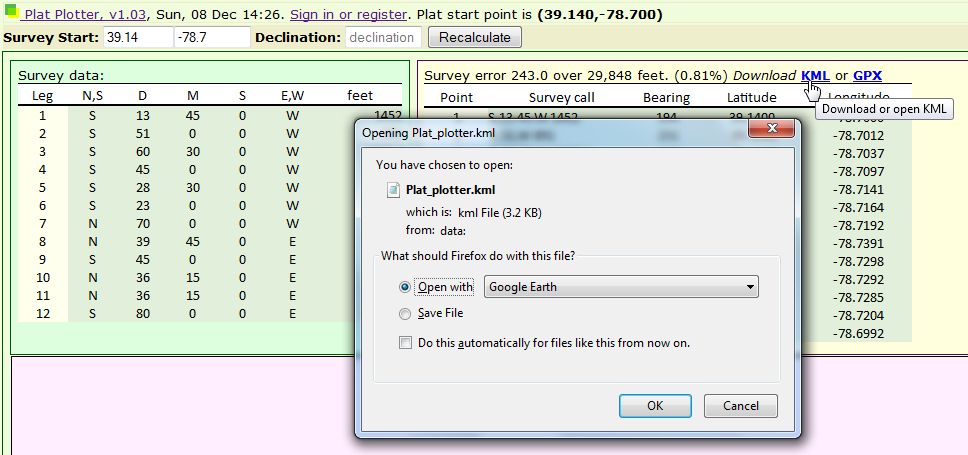
6. Save the CSV, KML or GPX data files.
On devices with Google Earth some browsers will be able to automatically open the KML data in Google Earth.
Some browsers will be able to automatically open the GPX data in a GPS program like Garmin BaseCamp or TopoGrafix EasyGPScan.
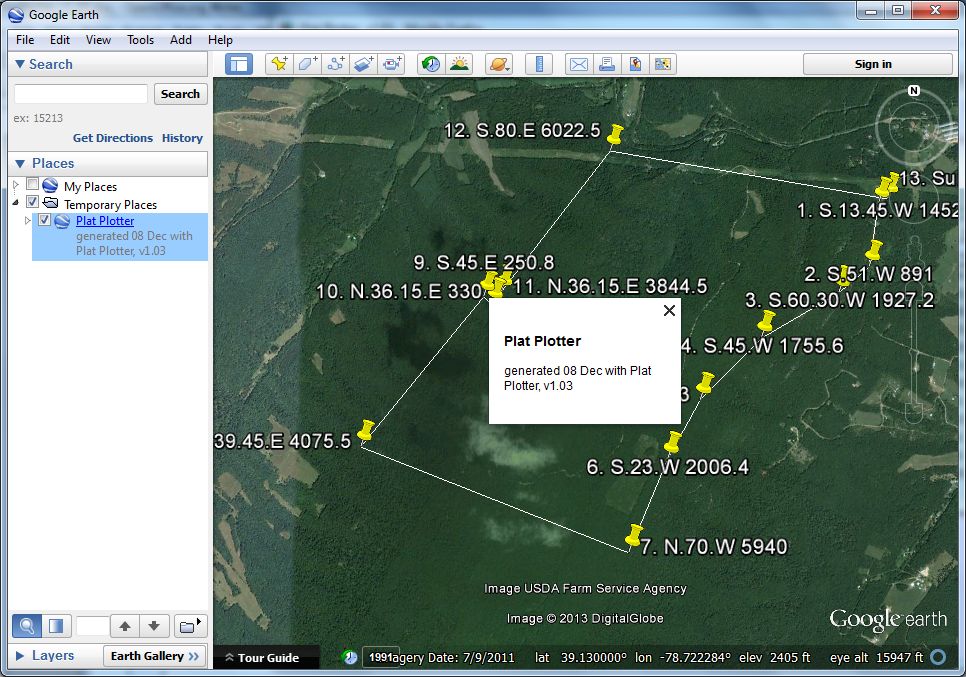
7. Use the KML file to transfer the Plat to Google Earth.
Google Earth provides additions tools to visualize the Plat, as well as publish to the web.
8. Use the GPX file to transfer the Plat to a GPS device.
Garmin BaseCamp (shown) or TopoGrafix EasyGPScan can upload the Plat to a GPS device. (GPX files have also been tested on Garmin's older MapSource software.)

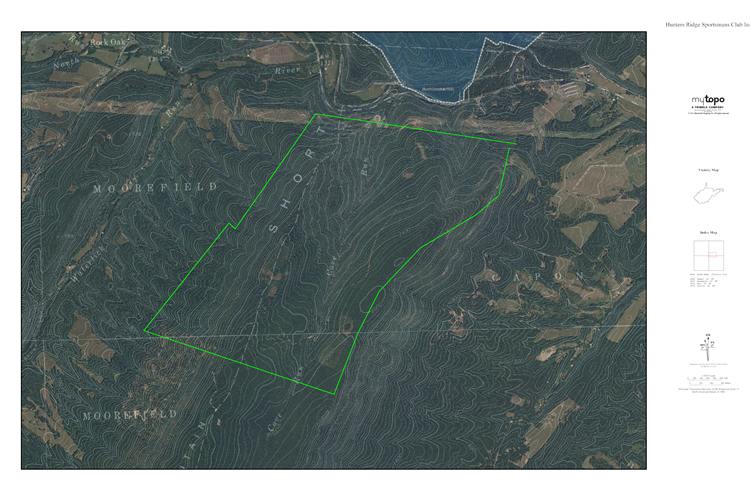
9. GPX uploaded to MyTopo.com
MyTopo creates custom maps for outdoor use or framing.
10. Additional features available with a Google login: Logging in with a [free] Google account enables the program to store survey data, allowing additional features, including:
- Keep saved Plats online
- Re edit saved Plats
- Plot multiple properties at the same time
- Publish properties on the web
- Set default work area and map settings
- Save contact information with survey CSV, KML and GPX files